 MillwiseEarly version
Version 0.8 · free and open source (GPL 3)
From drawing to G-code for your CNC mill
Millwise turns DXF drawings and STL models into toolpaths and writes G-code for GRBL, FluidNC and LinuxCNC controllers. Choose a cutter and an operation, click the curves, watch the whole job in the simulation and export the program - all in one window.
An early stage of development: the program changes from day to day, and its G-code has only had first runs on a real machine. Always check the program before running the machine.
- Current version
- 0.8.0 (early test version)
- Price
- free
- Licence
- open source, GPL 3
- Machines
- 3-axis CNC mills: GRBL, FluidNC, LinuxCNC
- Runs on
- Linux
What it does
The whole milling job in one program
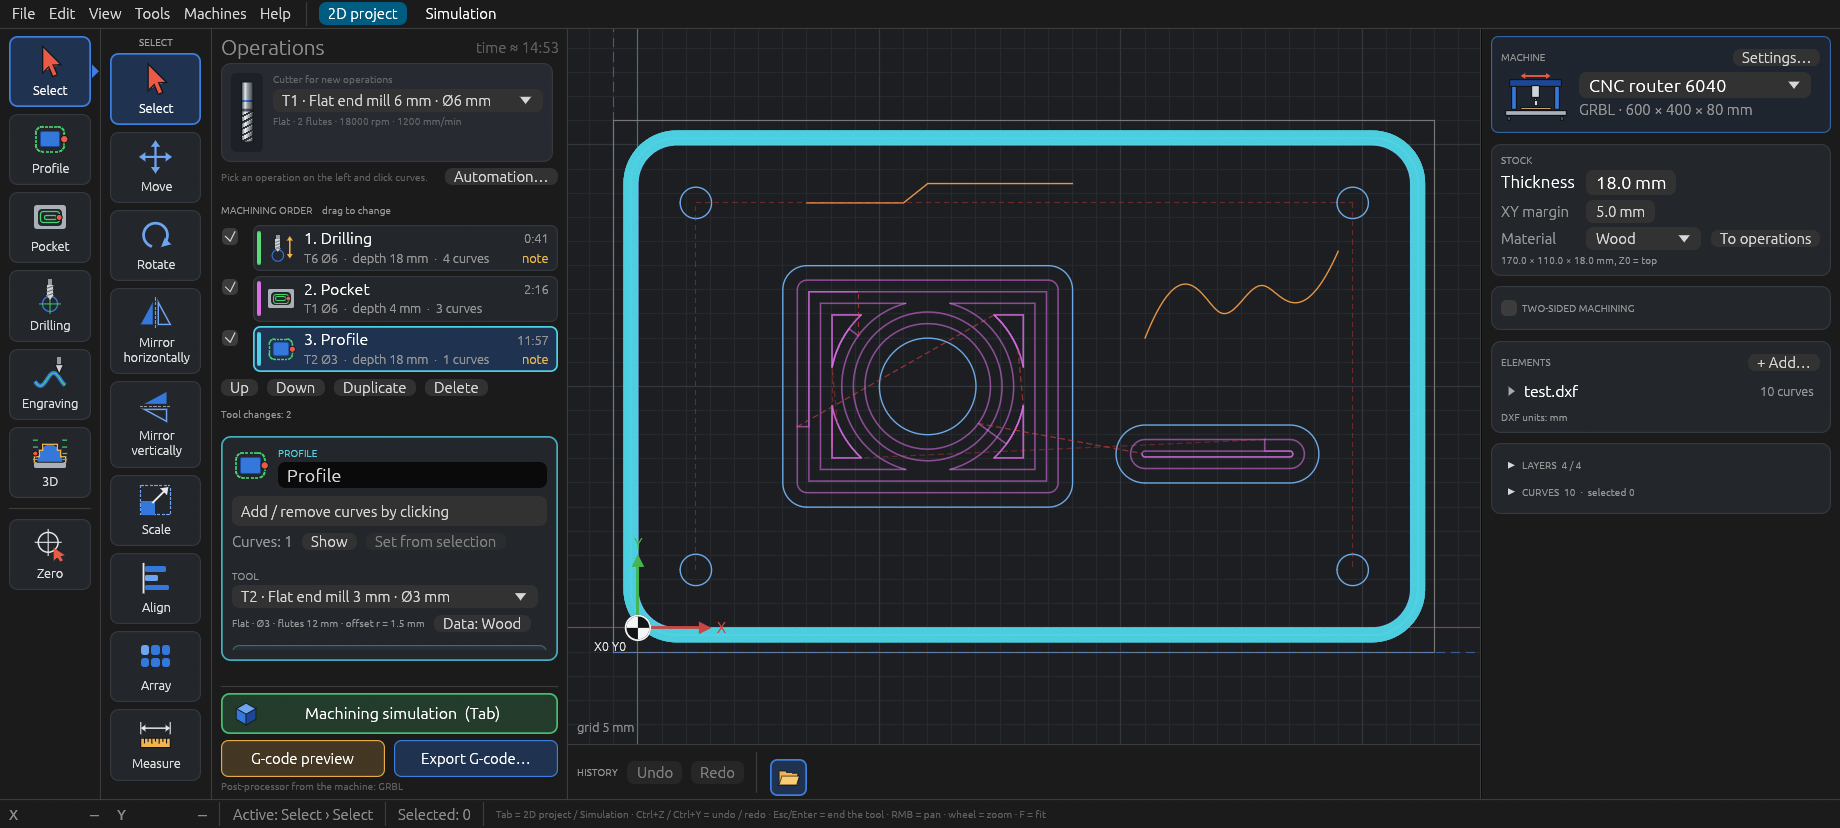
Millwise is free CAM software written in Rust, made for Linux. It machines 2D drawings and 3D models, shows the job in a simulation and writes G-code that fits your machine.
DXF drawings
Lines, arcs, circles, polylines with arcs, splines, ellipses and blocks. Loose pieces are joined into contours and inches are converted to millimetres. Text in any .ttf / .otf font is turned into curves.
Profile and pocket
Outside and inside profiles with tabs, ramp or arc lead-in. Offset, zigzag or HSM pockets (a small, even stepover), with islands and a finishing pass.
Drilling, engraving, V-carving
Single holes, peck drilling or helical hole milling. Engraving on the line, to its left or to its right. V-carving with the depth following the width of the shape.
Dog-bones in corners
The corners of inside profiles and pockets get dog-bones, so square parts go all the way in.
STL models in 3D
Roughing in layers; parallel, waterline, combined, spiral or radial finishing; rest machining with a smaller cutter; and cutting the part out along its silhouette.
Relief from a photo
A JPG, PNG or BMP photo becomes a 3D model: light areas higher, dark ones lower. Filters with a live preview, such as an oval for a portrait or terraces. A text or logo made of curves becomes a raised 3D shape.
Simulation on the graphics card
The material disappears move by move, smoothly at any program size. Rapid moves into the material are detected for the whole program.
Tool library
Flat, ball, tapered ball, bull-nose, V, engraving cutters and drills - each with a drawing and cutting data for wood, MDF, aluminium and acrylic.
Your machine
Work area, homing corner, feeds, spindle, tool change (pause, M6 or separate files), coolant, your own program start and end.
Two-sided machining
Holes for dowel pins and a mirrored side B in a separate G-code file.
Undo with history
A history bar with an icon for every action - click one to go back to it. Plus move, rotate, mirror, scale, array, copy and paste.
Offline, in two languages
Works without the internet and sends nothing anywhere. The interface and the user guide are in English and Polish.
STL models
3D machining without a separate program
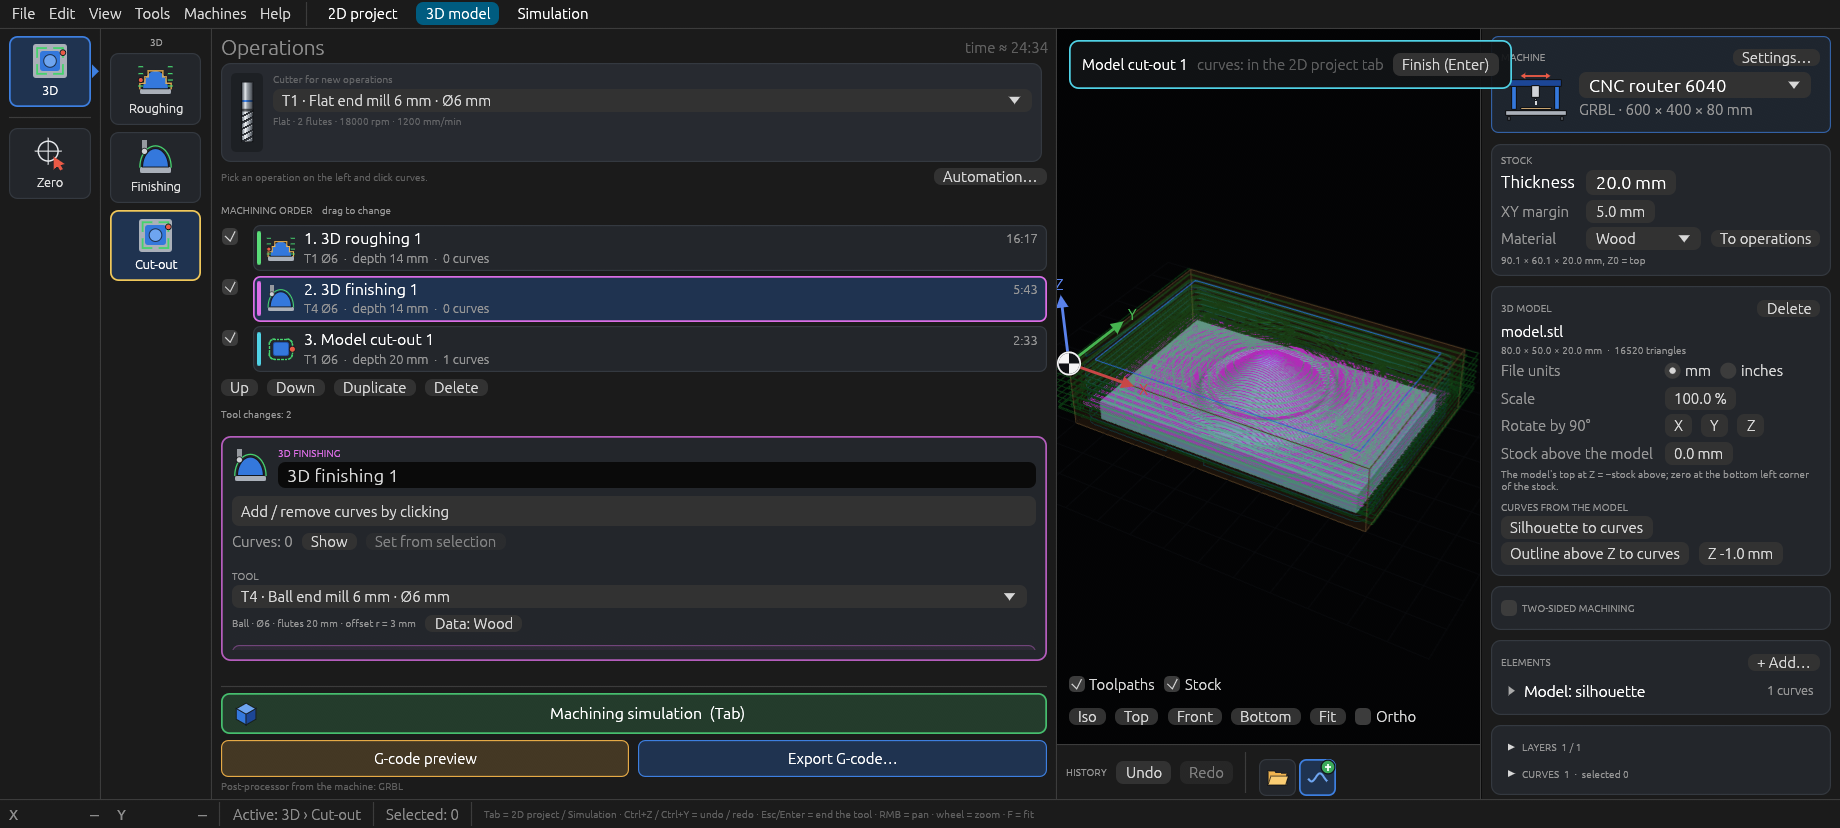
You open an STL file just like a drawing. The model goes into the stock - set the units, the scale, 90° rotations and the stock left above the model - and gets its own 3D model tab.
- Roughing - in Z layers around the model, with extra layers just above flat areas, so a full step of material is not left on them.
- Finishing - parallel passes, waterline for steep walls, combined (waterline on steep areas, parallel on gentle ones) or spiral and radial for domes, bowls and rosettes. A slope range lets you, for example, run a flat cutter over the floor only. A tapered ball cutter is computed with its real shape.
- Rest machining - a smaller cutter reaches where the larger one could not.
- Cut-out of the part along the model's silhouette, with tabs. The silhouette and the outline at any height can also be used as curves for 2D operations.
- Relief from a photo - a JPG, PNG or BMP picture becomes a 3D model (light higher, dark lower), with filters and a live preview: black and white point, smoothing, flat background, terraces, an oval for portraits, a frame.
- 3D shape from curves - a selected text or logo becomes a raised model with a flat, rounded, chamfered or domed edge, or a recessed one (a bowl, an engraved text).
- A warning about undercuts. 3D toolpaths are computed in the background, so the window keeps working.
Simulation
See the job before the machine does
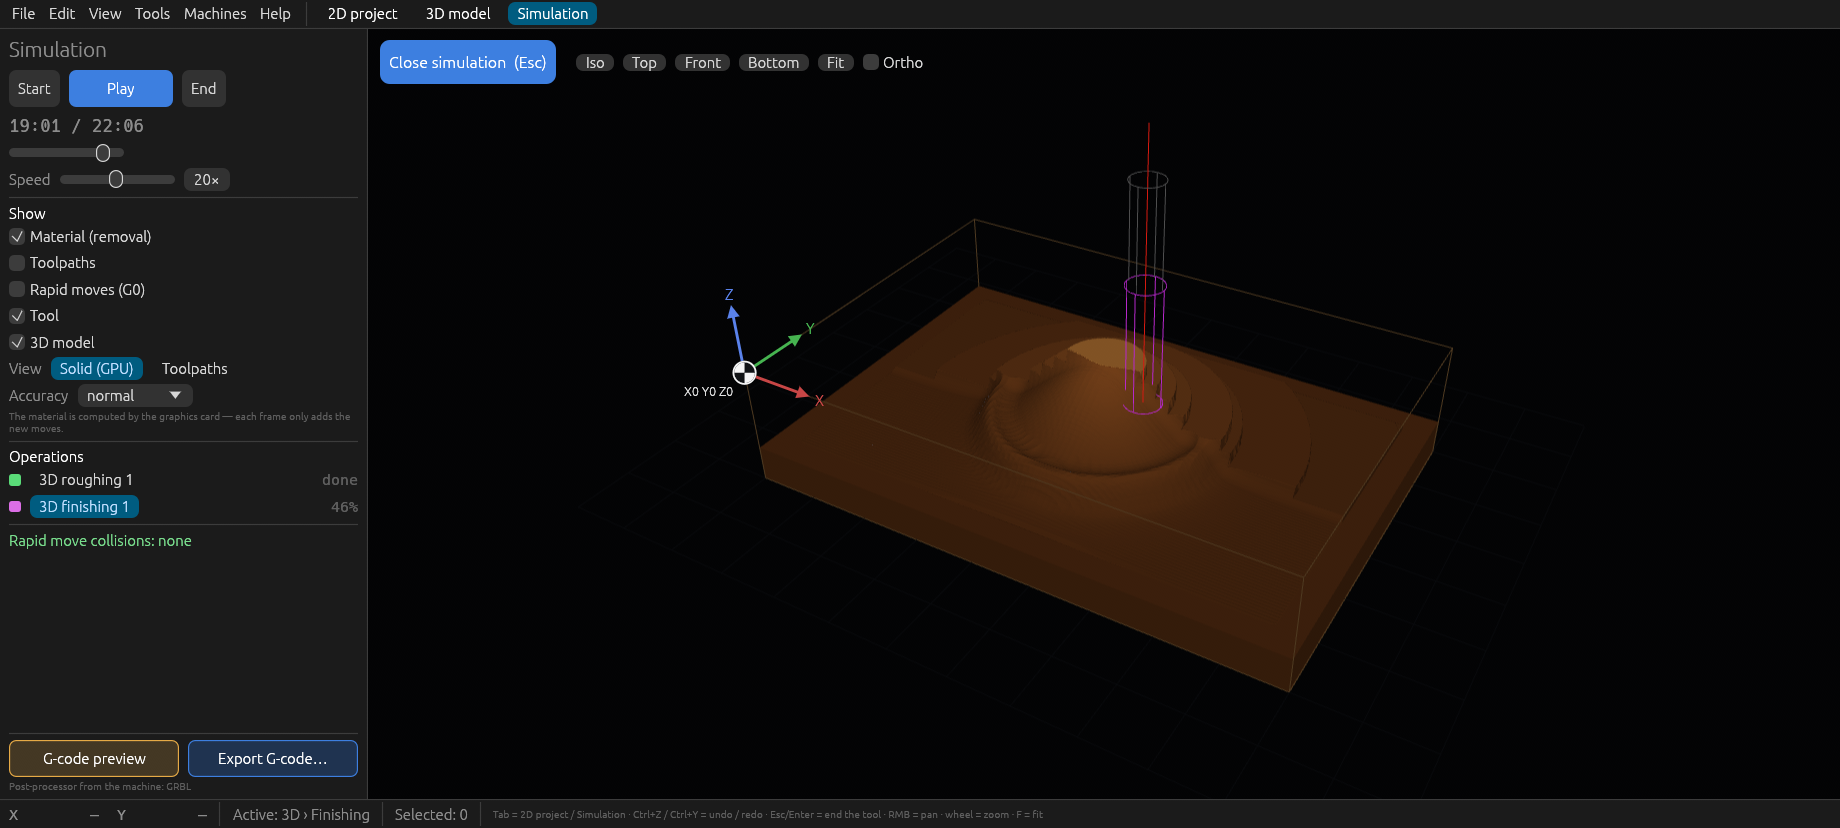
- Solid computed by the graphics card - the material disappears move by move, smoothly at any program size.
- Solid computed by the processor - an exact solid for weaker graphics.
- Paths - the target model and the layer being milled, at once at any program size.
- Play, pause, scrub and jump to an operation. The program checks that no rapid move goes into the material.
Tool library
One library for all your projects
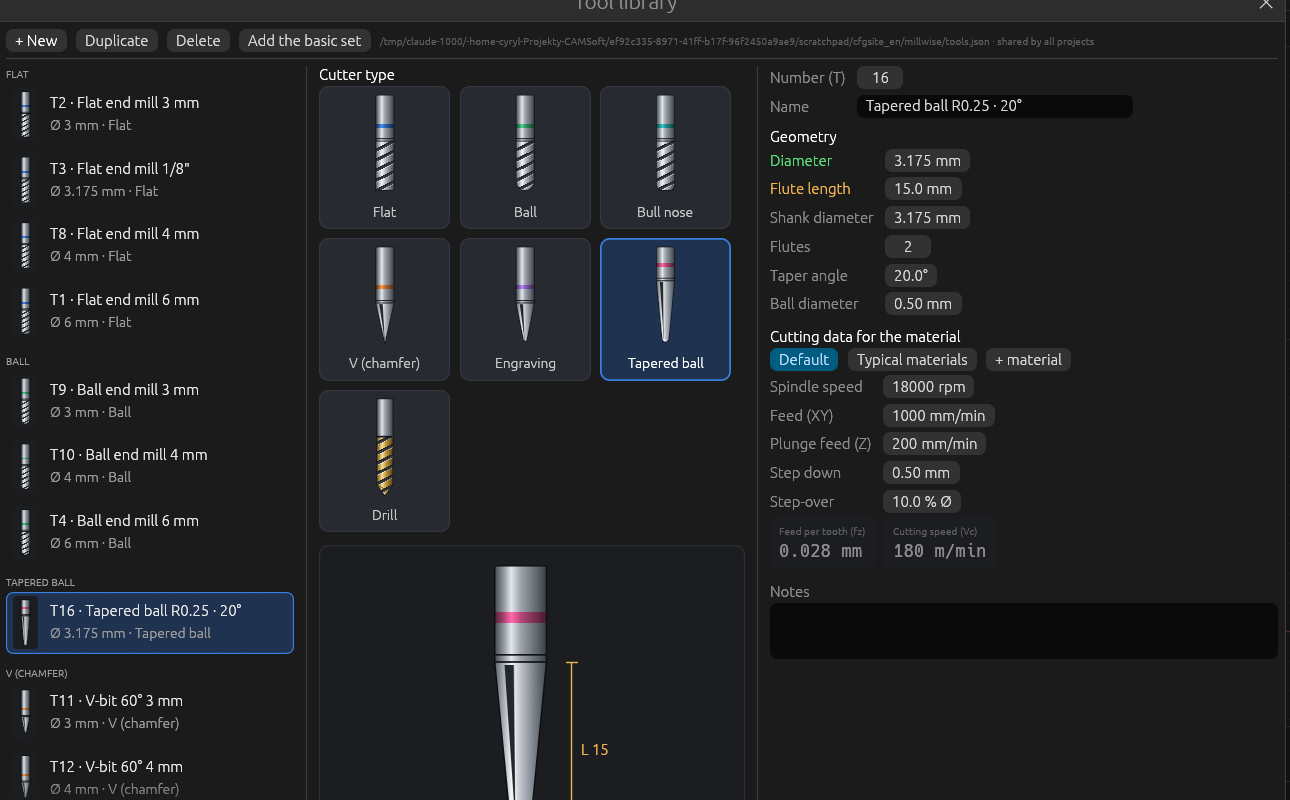
- Flat, ball, tapered ball, bull-nose, V and engraving cutters and drills - each with a drawing and its dimensions.
- Cutting data for materials (wood, MDF, aluminium, acrylic): choose the stock material and the feeds and speeds follow it.
- A basic set to start with: flat, ball and V cutters and 3, 4 and 6 mm drills.
- The project keeps copies of the tools it uses, so it opens the same on another computer.
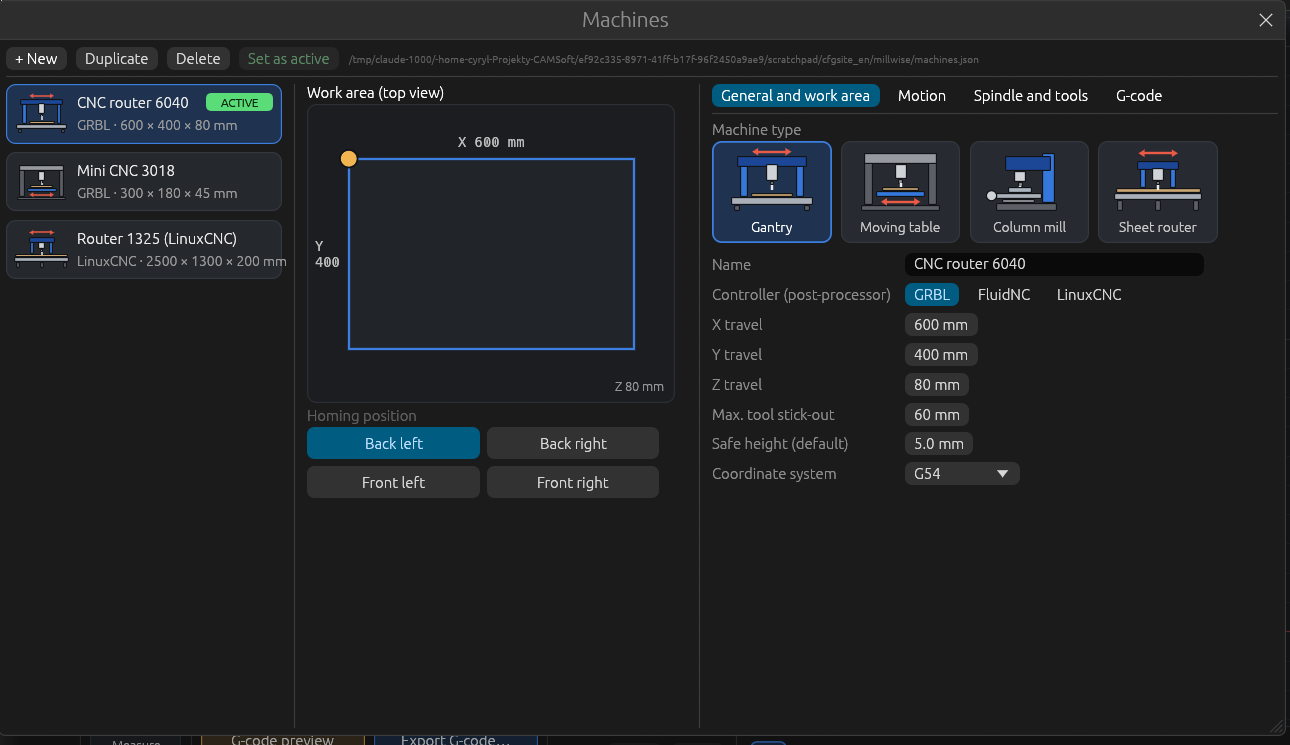
Machines and G-code
G-code that fits your mill
- GRBL, FluidNC and LinuxCNC controllers, work area, homing corner, maximum feeds and rapids.
- Spindle (speed range and spin-up time), tool change - an M0 pause, M6 or a separate file for each cutter - and coolant.
- Your own program start and end, G2/G3 arcs or line segments.
- Every operation is checked against the machine: work area, depth, feeds.
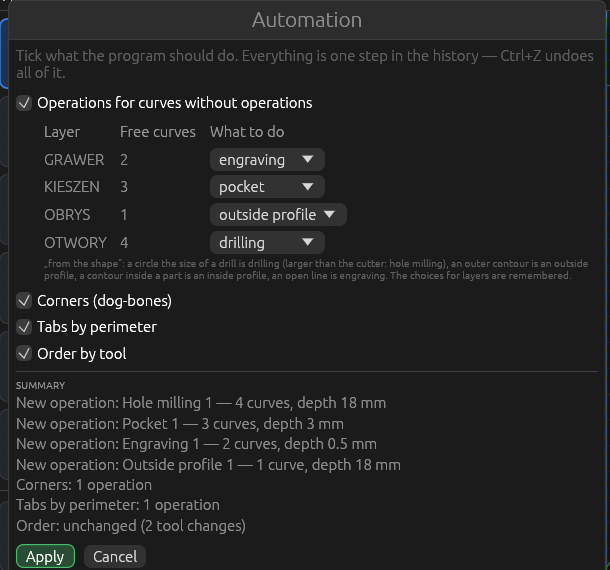
Less clicking
The whole drawing in one step
- Automation creates operations for all free curves by the layers of the drawing: for example a holes layer becomes drilling, a pocket layer a pocket, an outline layer an outside profile.
- In the same step it adds dog-bones in corners, tabs by perimeter and puts operations with the same cutter one after another, so there are fewer tool changes.
- Several DXF drawings, models and projects can be combined in one
.millwisefile, together with the stock, the operations and the tools.
Screenshots
See what it looks like
Click a screenshot to enlarge it.
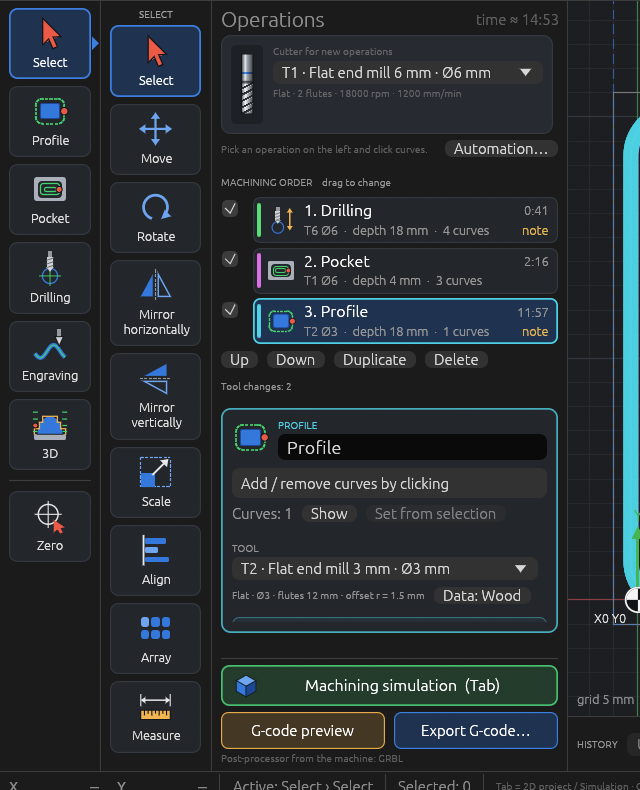
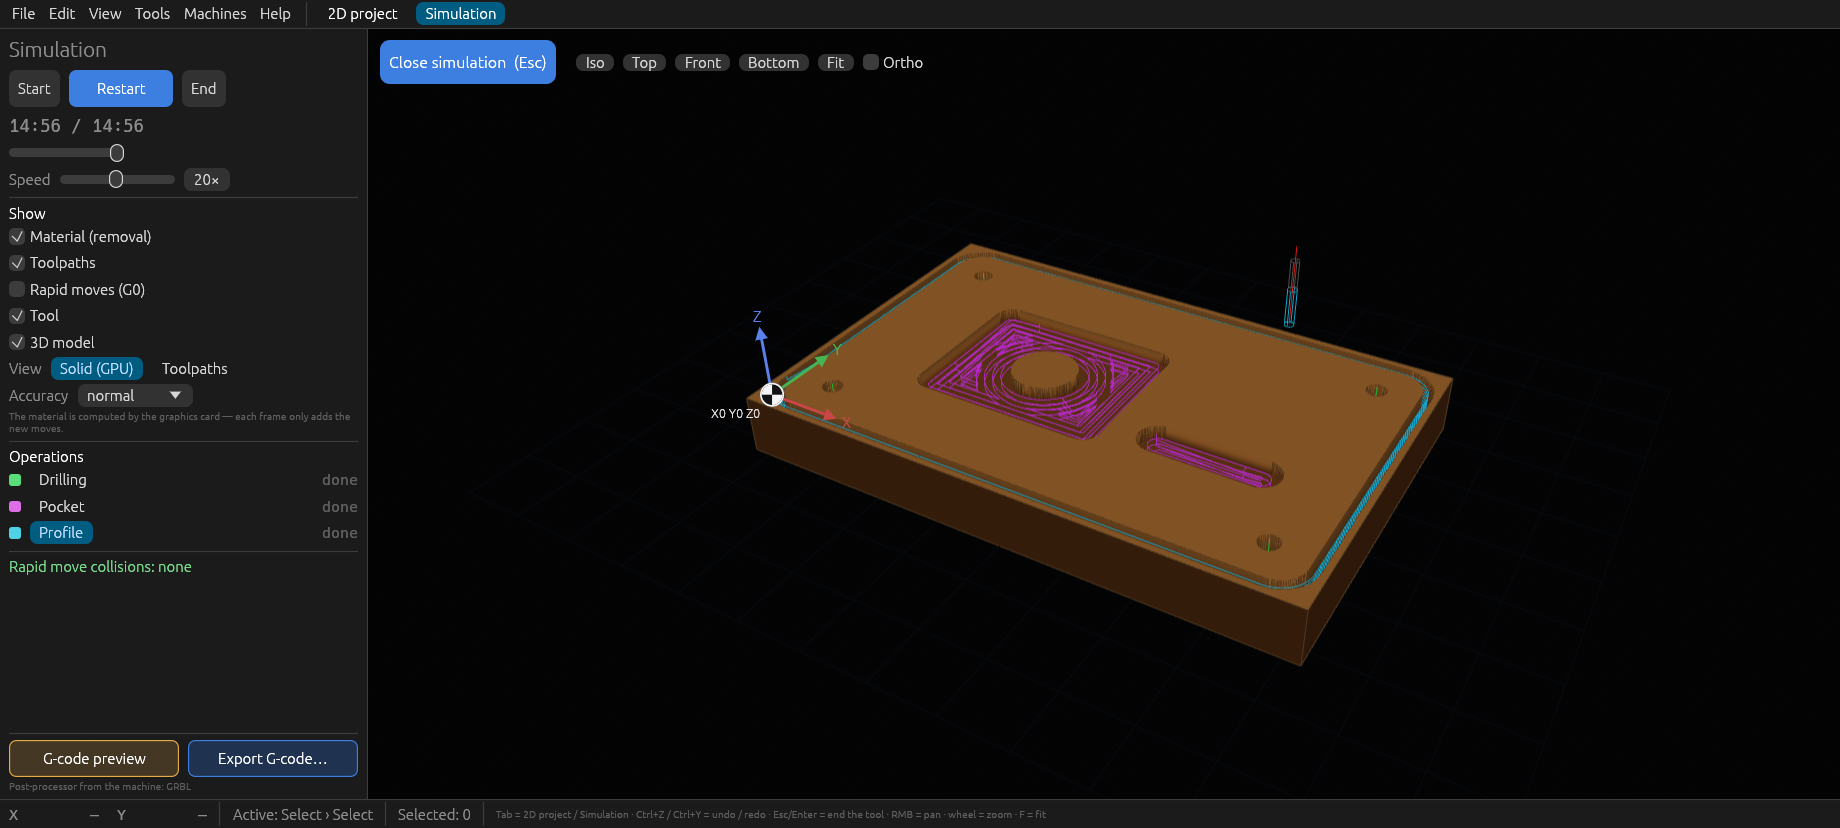
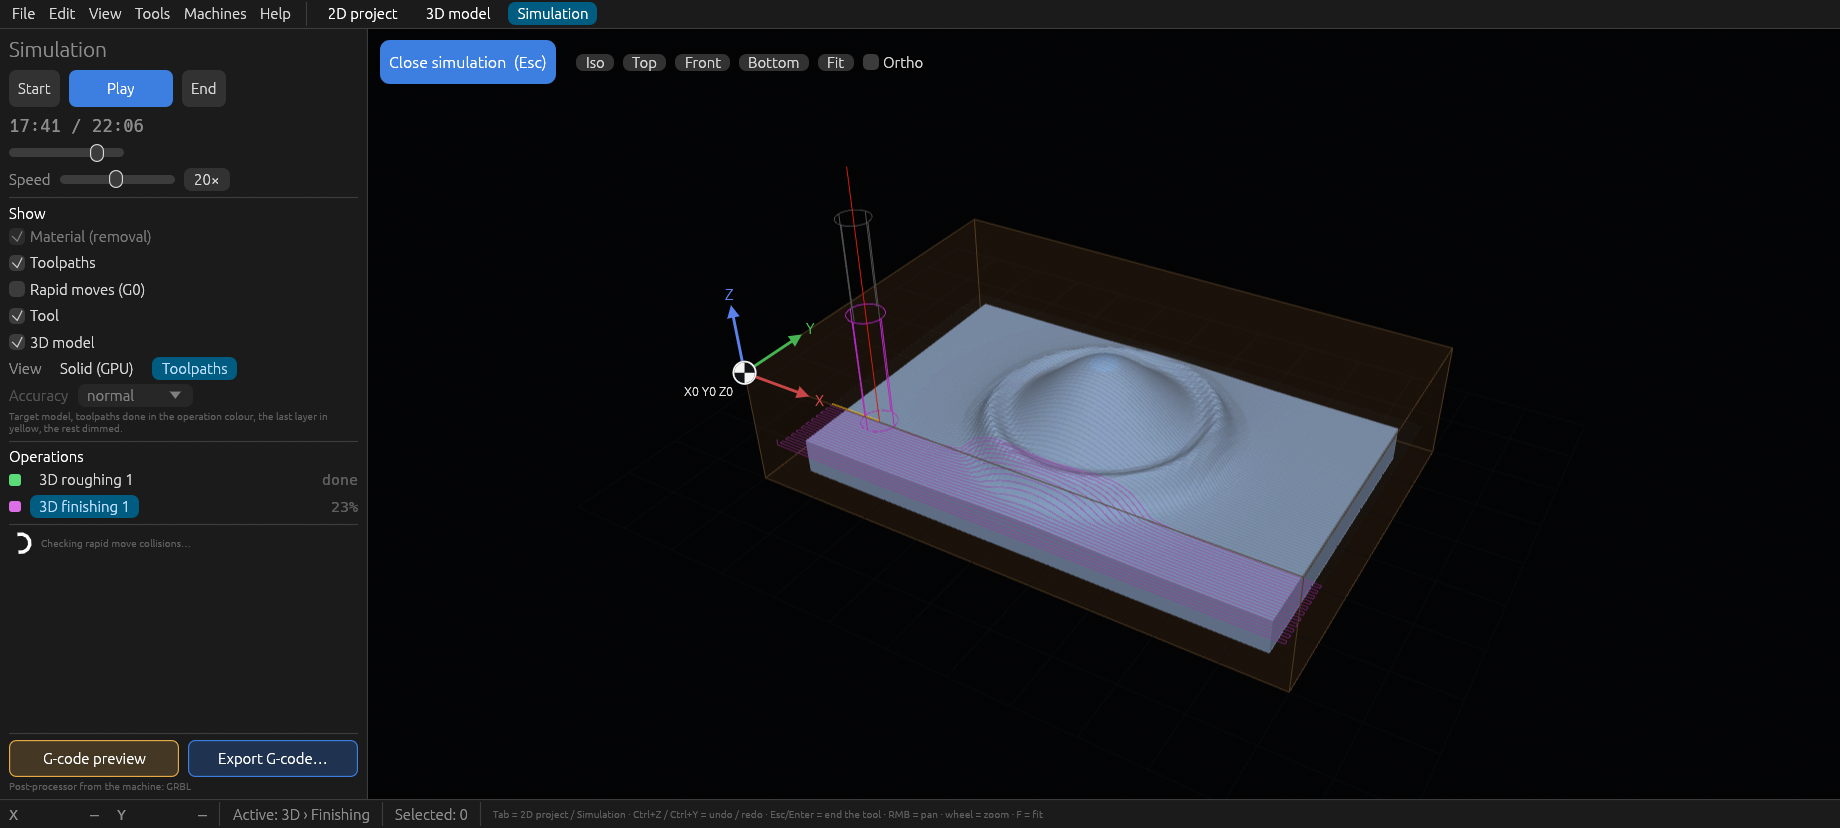
Getting started
Download and run
Free, no account and nothing to install: the releases page has an AppImage for Linux. Versions for Windows and macOS are not planned for now.
Linux - AppImage
One file, nothing to install. Download Millwise-…-x86_64.AppImage from the releases page and run it:
chmod +x Millwise-*-x86_64.AppImage
./Millwise-*-x86_64.AppImage
It runs on Debian 12 / 13, Ubuntu 22.04 or newer and other distributions from that time. On NVIDIA cards, and whenever the default graphics fail, the program picks OpenGL by itself. If the window still does not open, start it with the --gl option.
From source
You need a current stable Rust:
git clone https://github.com/cyryllo/millwise.git
cd millwise
cargo run --release -p millwise -- samples/demo.millwise
The packaging/linux/install-local.sh script installs the built program with its icon and a menu entry for the current user.
Everything step by step: the user guide. What changes in each version: the CHANGELOG.
Project status
An early test version
Millwise 0.8 (November 2026) already does 2D and 3D machining, but it is at a very early stage and changes from day to day. The first runs of its G-code on a real mill with a FluidNC controller went well, but the accuracy of the dimensions has not been measured yet, and 3D machining has not been tested on a machine. Always check the G-code before running it - the program comes without any warranty.
Planned: engraving on 3D surfaces, a warning when the tool holder would rub against the material, a pencil pass and re-roughing, and nesting 2D parts on a sheet. See the changelog and the plans.
Found a problem or have an idea? Open an issue on GitHub - in English or Polish. Testing on your own machine and describing how it went helps the most.
Got a CNC mill? Try Millwise
Download the AppImage, open a drawing or a model and watch the job in the simulation. At this stage, testing on your own machine helps the most - feedback is welcome in English or Polish.
Screenshots: Cyryl Sochacki, from the Millwise repository, version 0.8 (GPL 3).Other projects
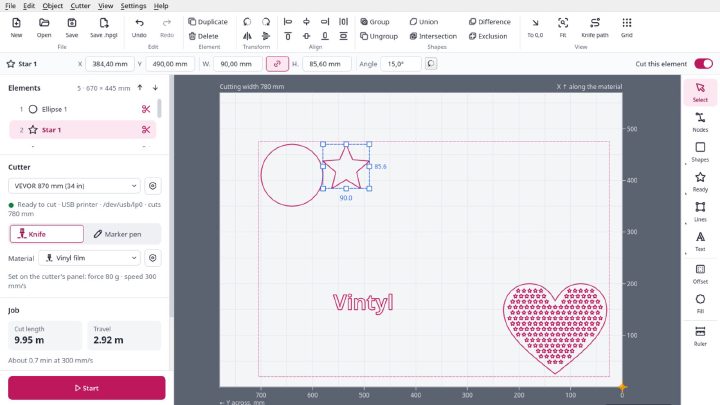

Vintyl
Free software for vinyl cutters on Linux: drawing, SVG and DXF files, laying out on the sheet and cutting straight from the window on VEVOR, Seiki and similar cutters. Knife compensation, materials, pen mode, designs in several colours. AppImage, GPL 3.
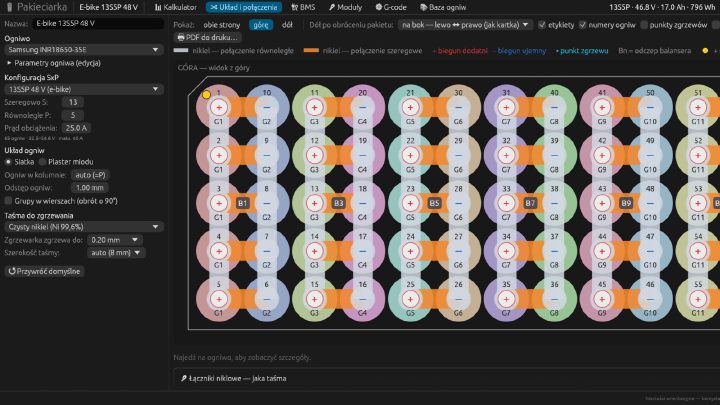

Pakieciarka
A configurator for battery packs built from 18650 and 21700 cells: a calculator, connection drawings, nickel strip and BMS selection, a heat map, a 1:1 PDF template and G-code for a CNC spot welder. Linux, macOS and the browser. Interface in Polish.
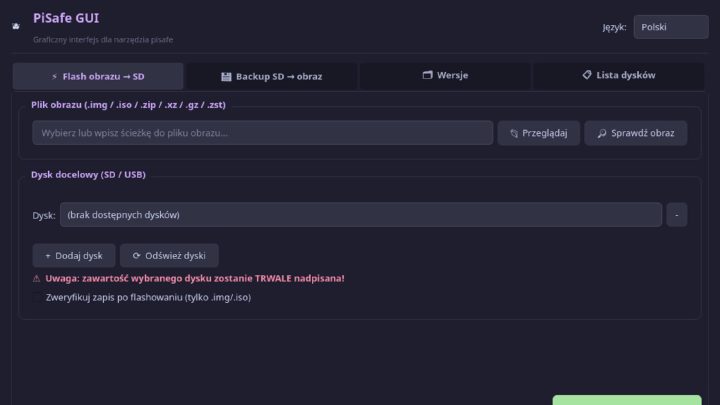
PiSafe GUI
A desktop program for writing system images to SD cards and USB sticks and backing cards up - for the Raspberry Pi and other boards. Protection for system disks, checksums, several cards at once.