 Kerfly
Version 1.8 · free and open source (GPL 3)
A modern window for your K40 laser
Kerfly runs the popular blue-and-white CO2 lasers with Lihuiyu M2 Nano boards. You lay out your design on a picture of the bed, draw, split the work into cut and engrave layers - and the laser is driven by the proven core of K40 Whisperer.
An installer for Windows 10 / 11, an AppImage for Linux and a preview for macOS - no Python to install. A stable version, tested on a real laser.
- Current version
- 1.8.0 (stable), 2.0 in testing
- Price
- free
- Licence
- open source, GPL 3
- Lasers
- K40 with a Lihuiyu board (M1, M2, M3, B1…)
- Runs on
- Linux, Windows, macOS (preview)
What it does
Everything for laser work in one program
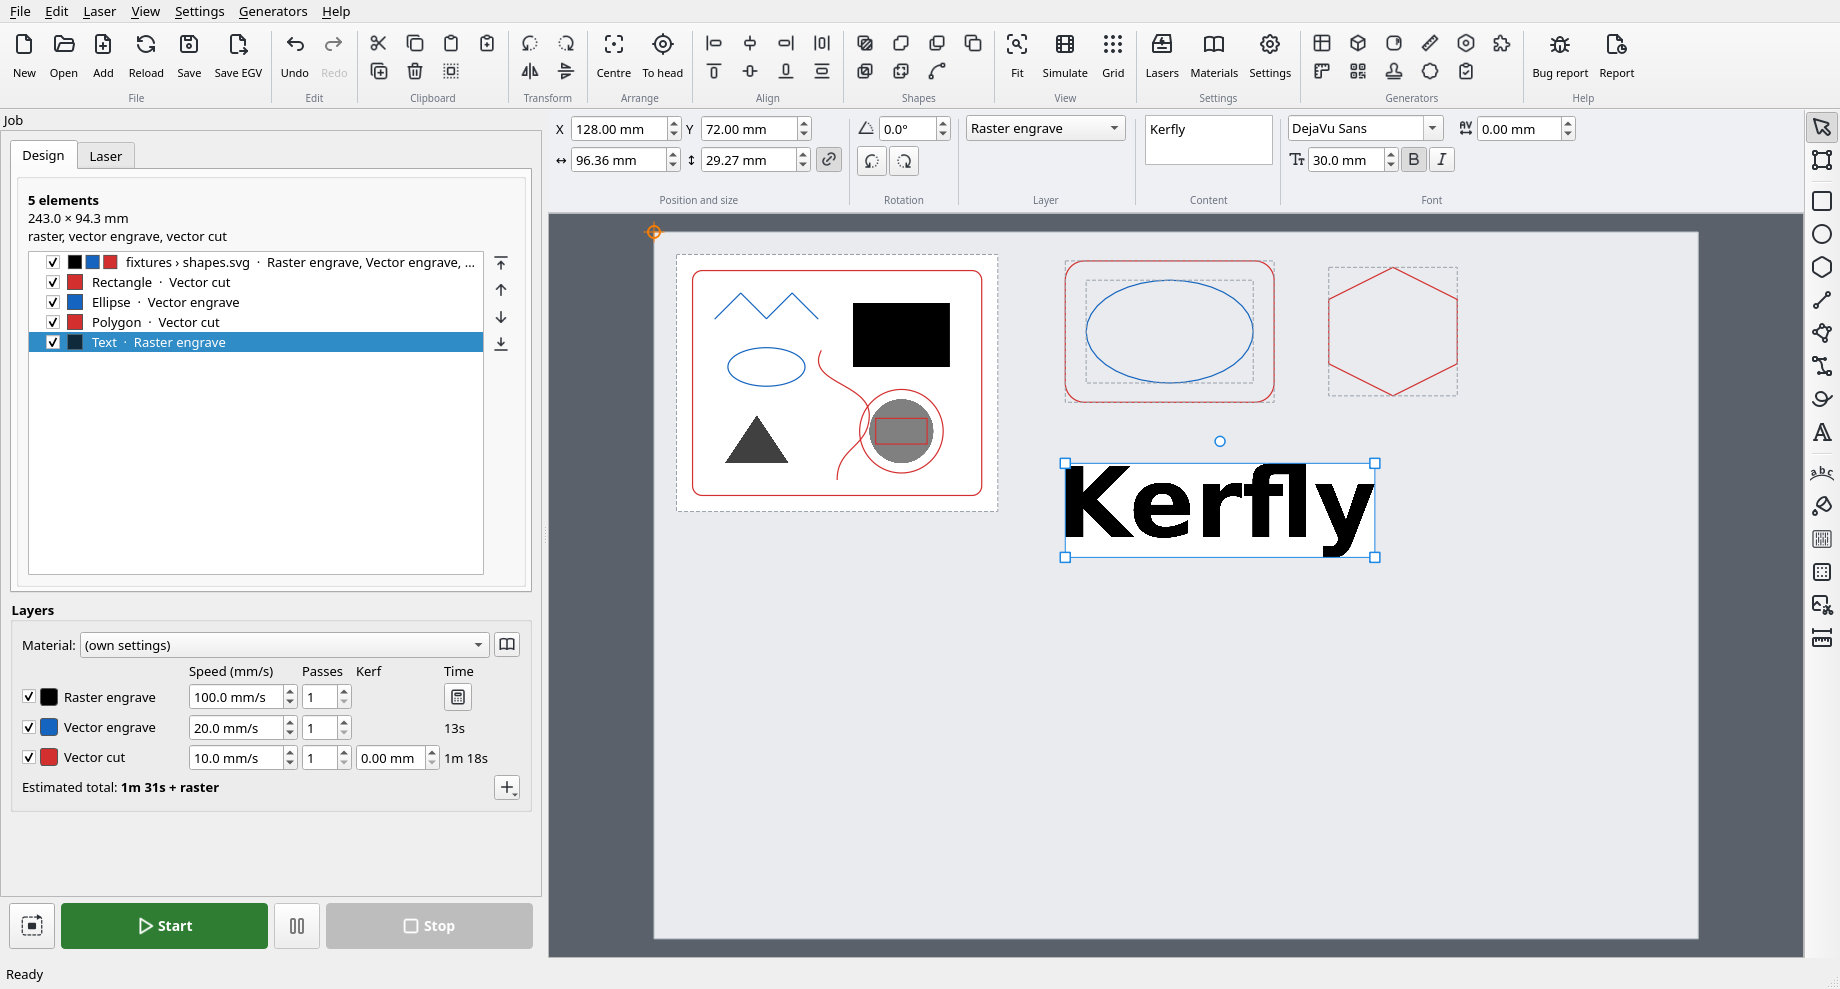
Kerfly keeps K40 Whisperer's laser control unchanged - after every change, the data sent to the laser is compared byte for byte with the original. Around that core you get a modern window with drawing and editing tools.
Lay out the bed
Several files on the laser bed at once: move, scale and rotate them with the mouse or type the values, align and group. Undo and redo everything.
Draw and edit
Rectangles, ellipses, polygons, lines, curves, freehand and text in any installed font, or in one of 18 built-in single-line fonts for fast engraving. Node editing, copy and paste, a right-click menu, Inkscape-style shortcuts.
Pattern fills
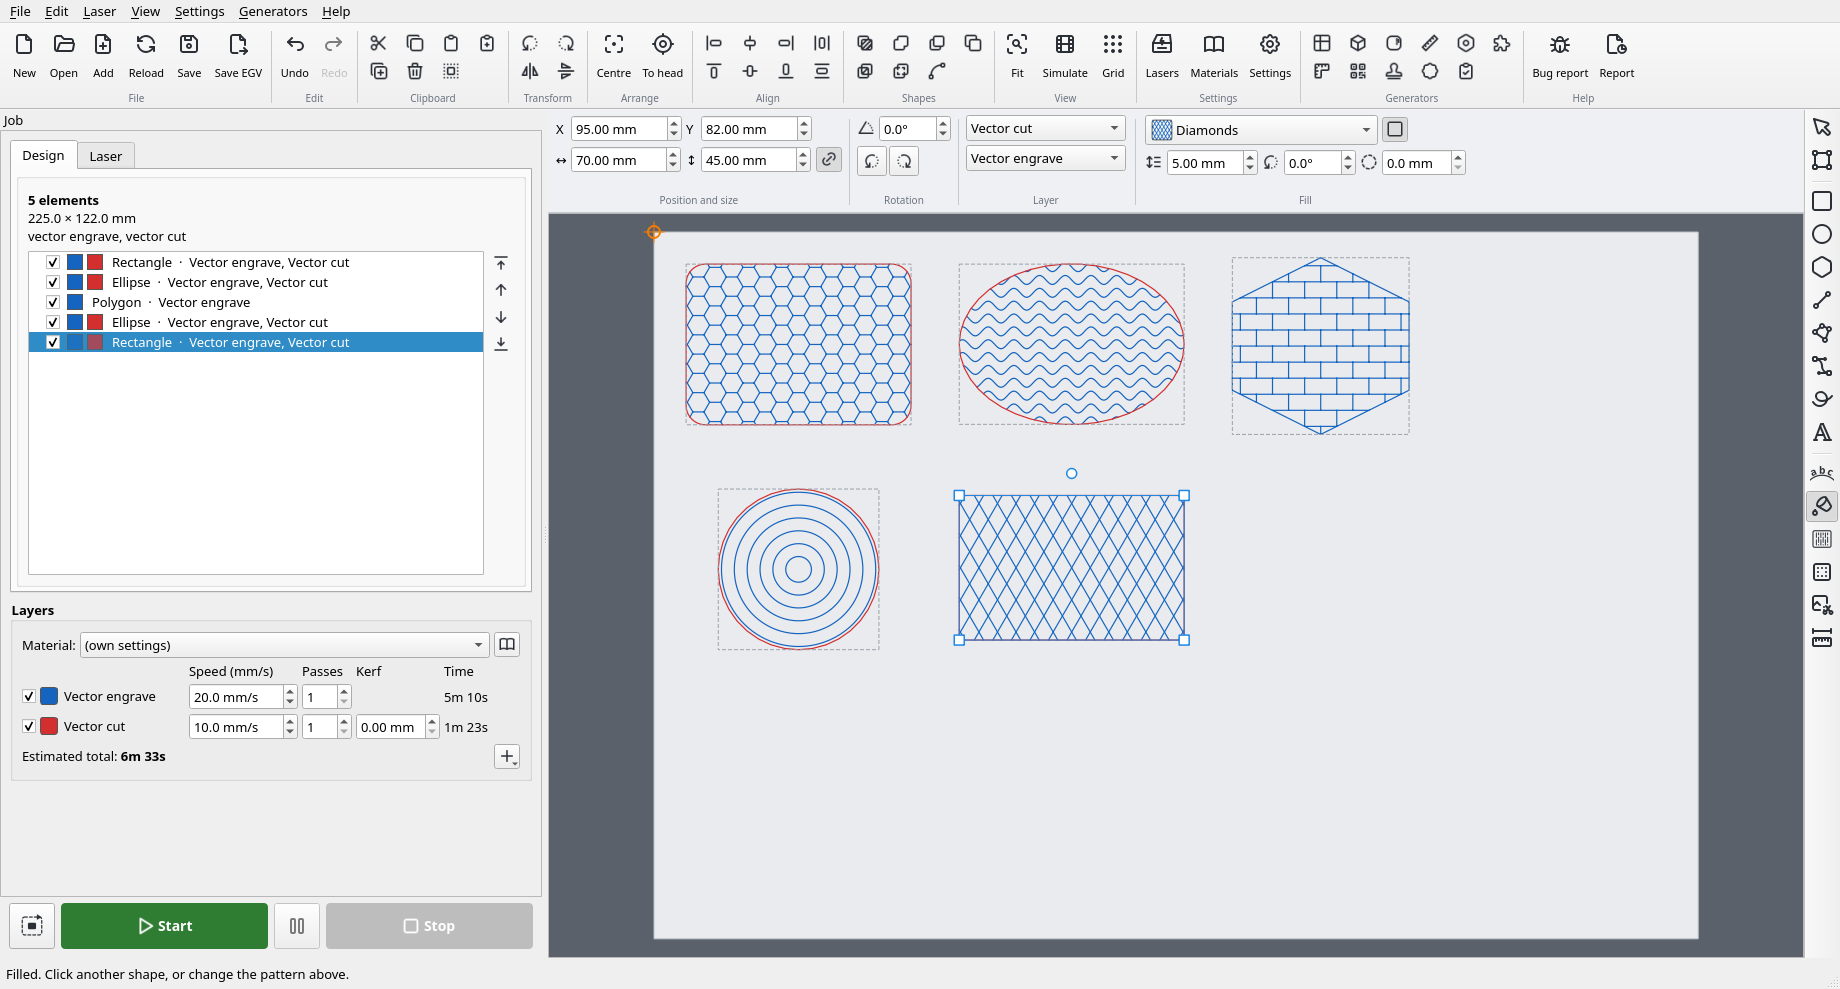
19 patterns engraved inside a shape - from lines, waves and honeycomb to a spiral, fish scales and a Hilbert curve - while its outline is still cut.
Generators
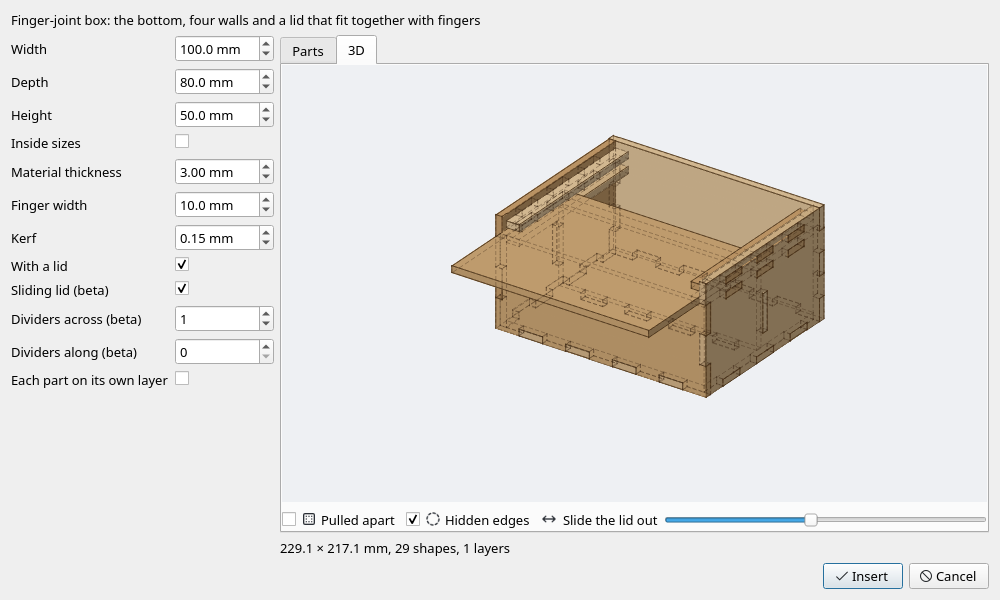
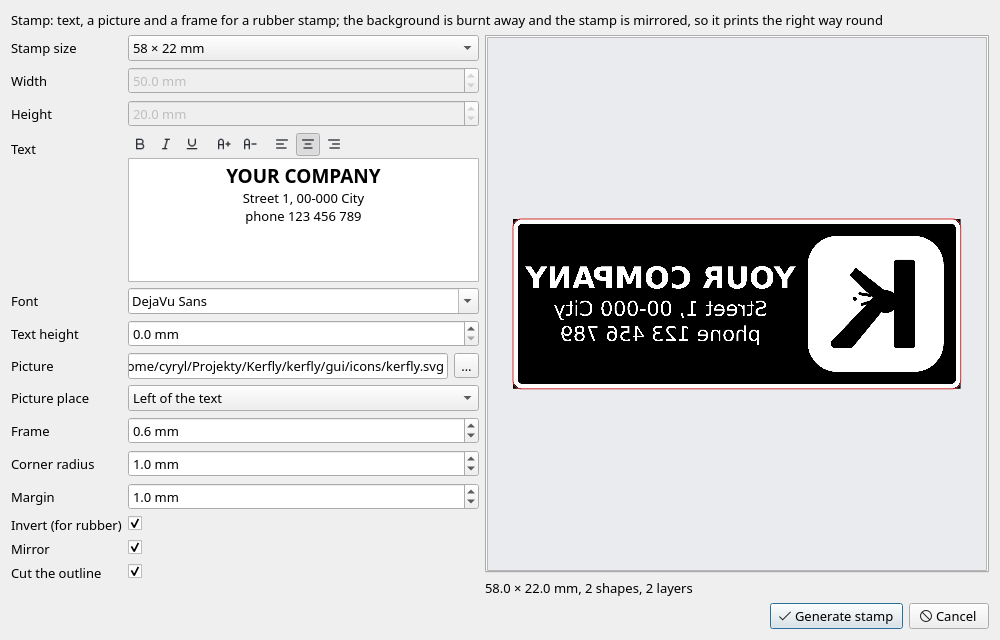
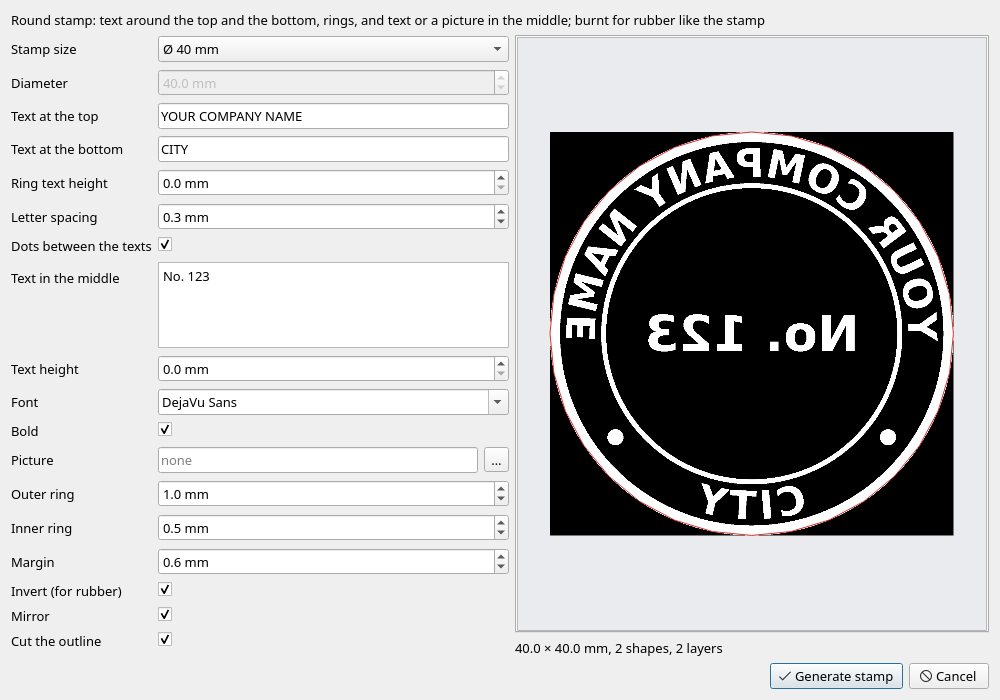
Ready designs from a few numbers: material test, finger-joint box (with a 3D preview, dividers and a sliding lid), kerf test, gear, puzzle, ruler, QR code, rectangular and round stamps, a laser test card.
Living hinges
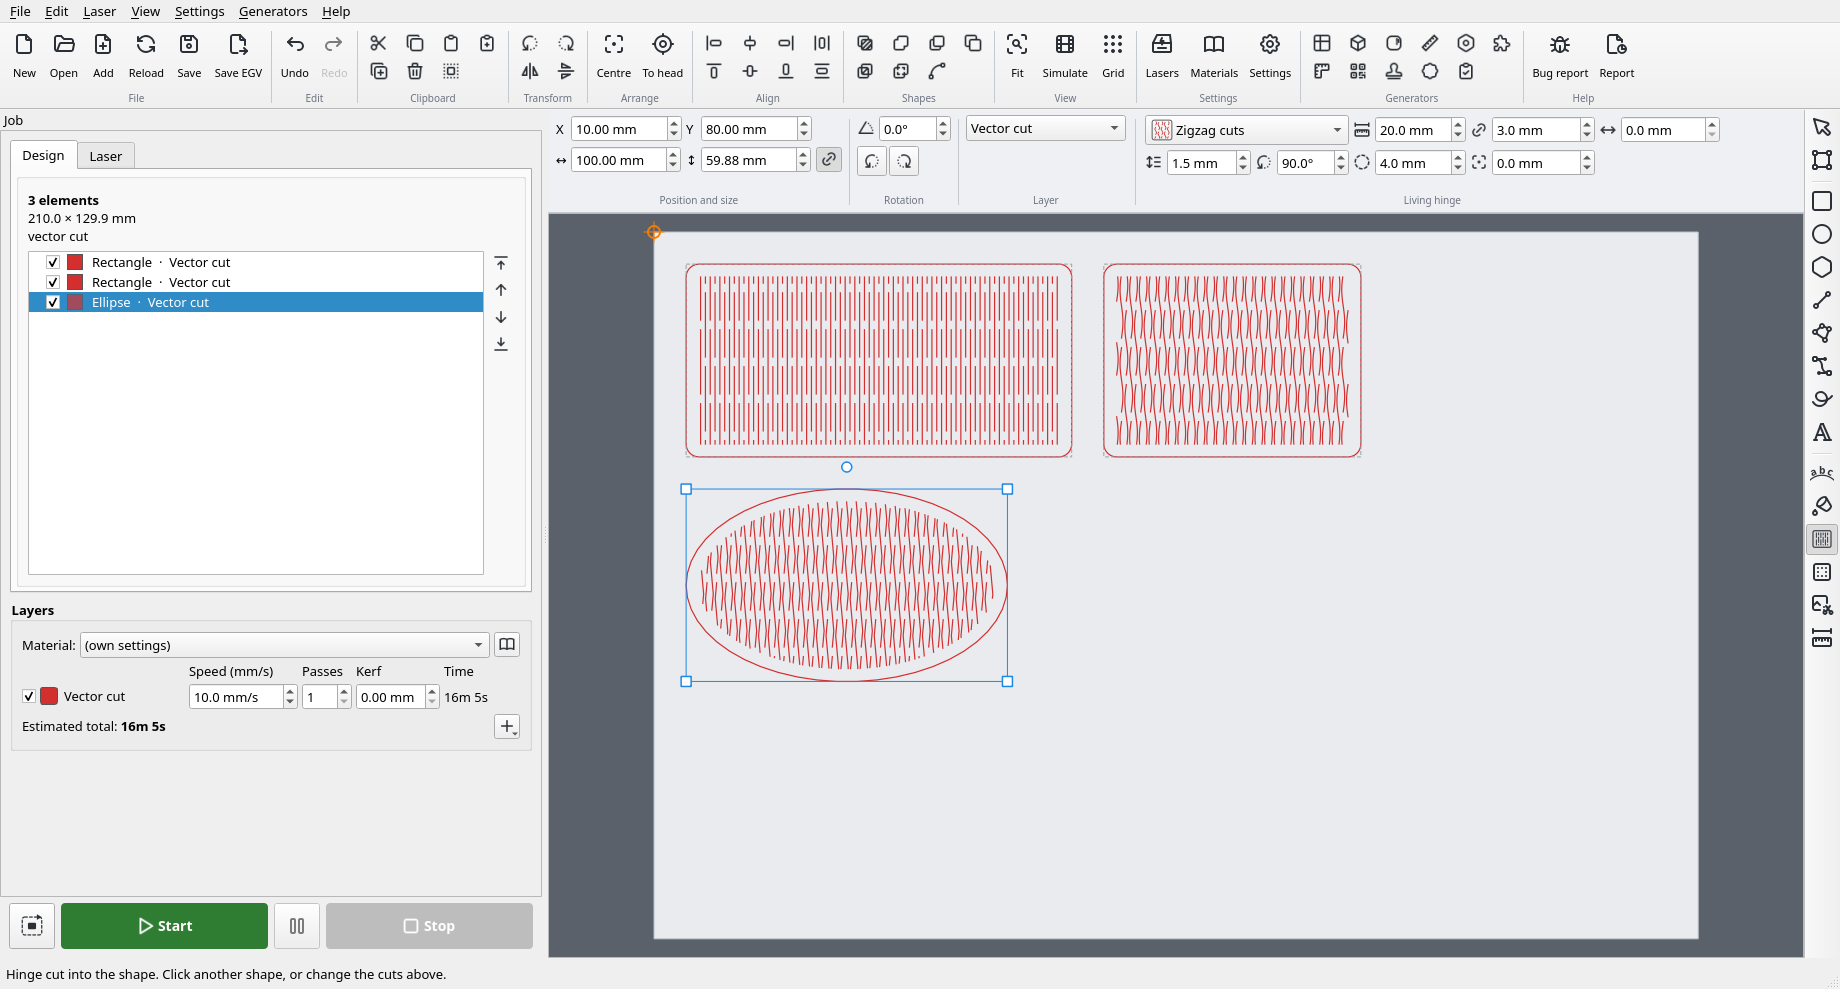
A field of cuts - straight, wavy or zigzag - that lets plywood bend. Over the whole shape or in a band of a given width. Cut length, bridges and spacing are set as numbers.
Parts at their exact size
Kerf compensation: type the width of your laser's cut, and outlines move out a little, holes move in. Plus the Offset tool - a border around a text or a smaller copy inside.
Photos and pictures
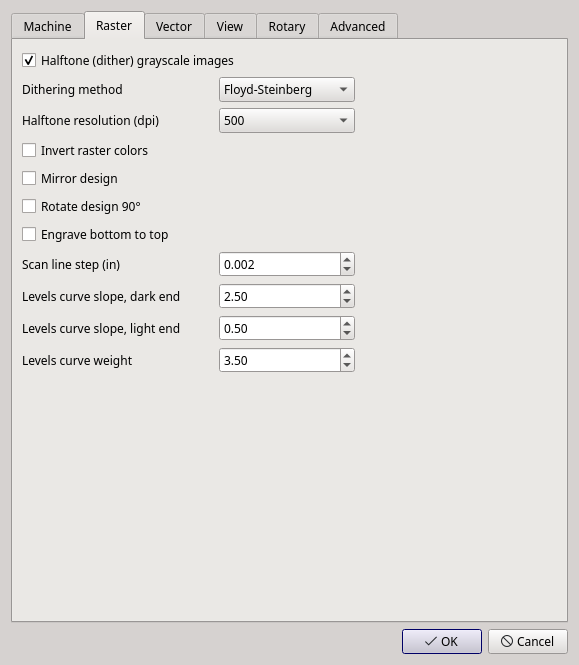
Photo engraving with a choice of dithering methods (Floyd-Steinberg, Atkinson, Stucki, Bayer and more), tracing a picture into cut paths and cutting a piece out of a picture.
Text on a path
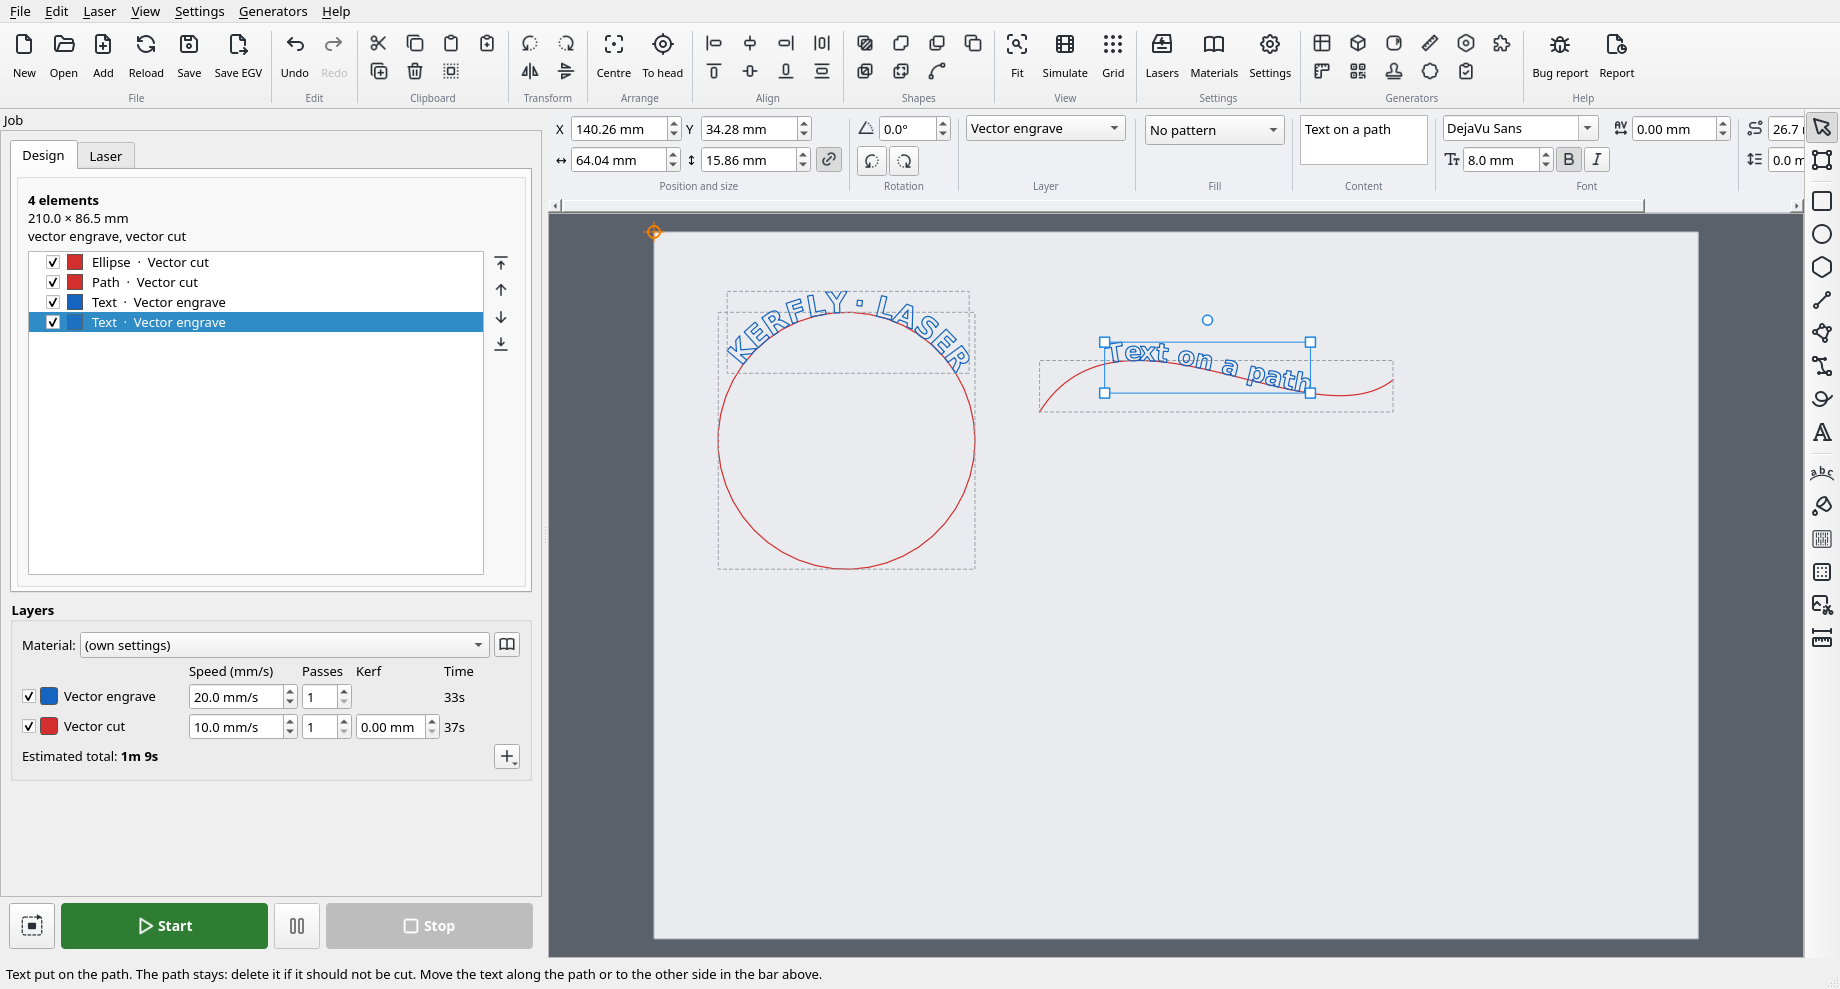
Text laid along a line, a curve or round a circle. Slide it along the path with the mouse or flip it to the other side.
Layers like LightBurn
Raster engrave, outline engrave and cut - each with its own speed, passes and power.
Material library
"Plywood 3 mm" or "Acrylic 3 mm" sets all layers with one choice. Add your own materials, export them and take them along.
Several lasers
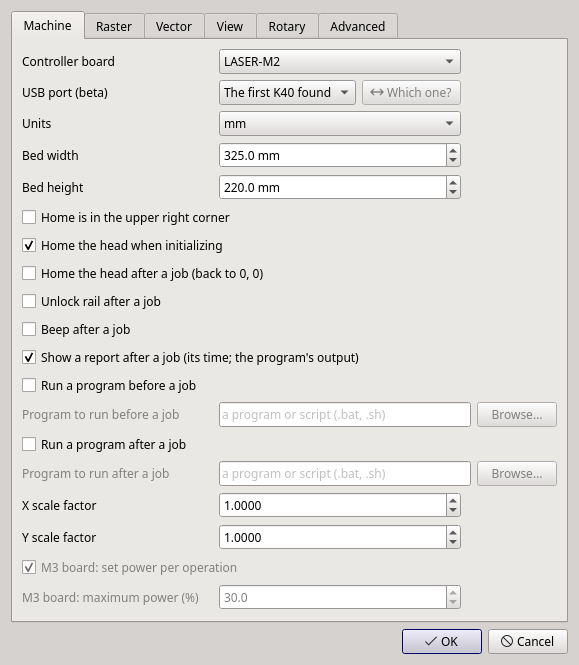
Laser profiles - board, bed, power and settings of each machine under one name. Two lasers on one computer are told apart by their USB port (beta).
The exhaust switches itself on
A program run before and after a job, for example to switch the exhaust or the air pump on and off. After the job, a small window with its time.
Many formats, no Inkscape needed
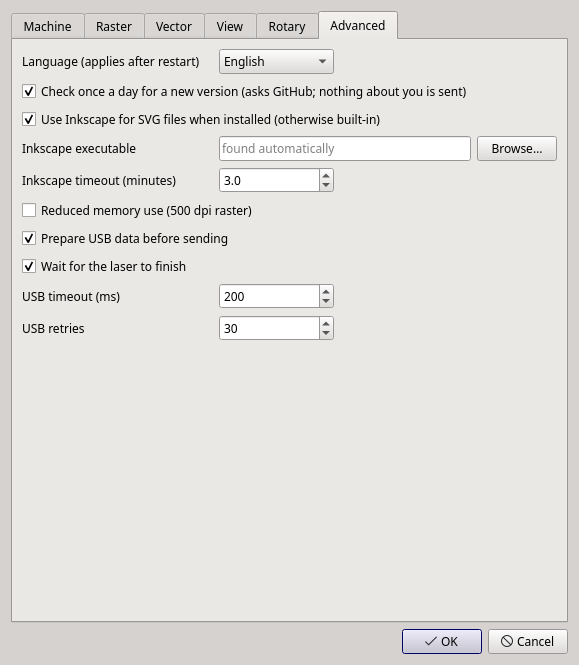
SVG, DXF, G-code and pictures: PNG, JPG, BMP, TIFF, GIF, WebP. Inkscape only helps with SVG text that is to be cut or engraved as an outline.
Bridges and shape operations
Bridges that hold cut parts in the sheet, union, difference and intersection of shapes. The order of the element list is the cutting order - set it with the buttons beside the list.
Safe work
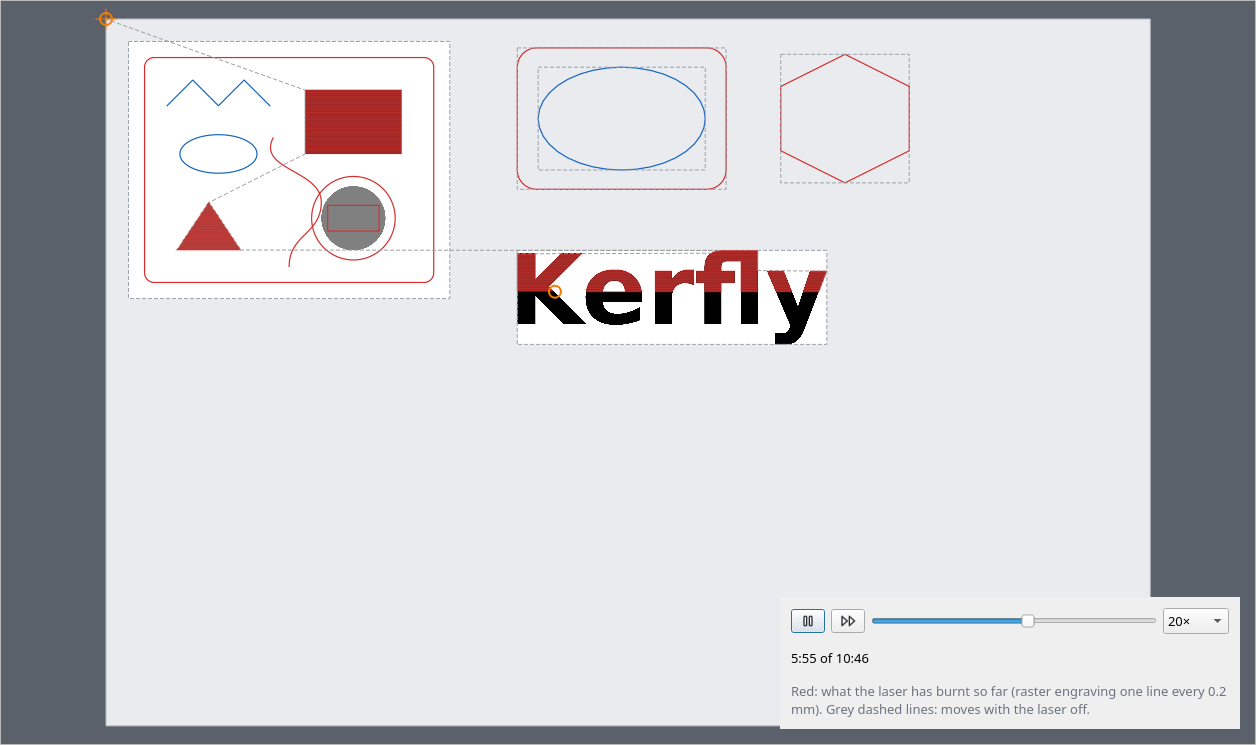
A trace round the rectangle of the design, a job simulation and an estimated time. Kerfly will not send a job that would run the head off the bed.
Like K40 Whisperer, if you want
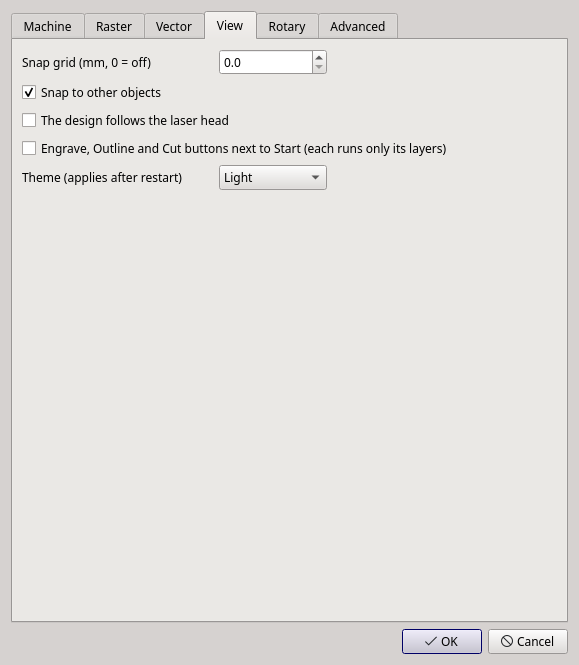
The same settings file. The design can follow the head or stay where it is on the bed - your choice.
Ready-made packages
A Windows installer that can install the laser's USB driver straight away, an AppImage for Linux and a disk image for macOS (Apple and Intel processors). No Python needed.
Your language
English, Polish, German, Spanish and French, a light or dark theme. A full user guide in English and Polish.
Patterns and hinges
Patterns, hinges and text on a path
Three tools you used to need a separate program for:
- Fill (the bucket) - click a closed shape and its inside gets one of 19 patterns: lines, cross-hatch, waves, zigzag, honeycomb, bricks, rings following the outline, a spiral, herringbone, fish scales, Truchet tiles, a Hilbert curve and more. Pattern size, angle and the margin from the outline are set in the bar above the bed, and holes in the shape stay empty.
- Text on a path - every letter stands on a line, a curve or round a circle, for example on a coaster or a medal.
- Living hinge - a field of cuts that lets plywood bend (more below).
Everything is saved in the project and undone in one step.
Living hinges
Plywood that bends
A box with a rounded corner, a notebook cover, a band round a jar - a living hinge is a field of dense cuts that lets a stiff sheet bend.
- Straight, wavy or zigzag cuts, horizontal or vertical.
- Set the cut length, the bridge between cuts and the row spacing; a solid strip of material stays along the outline.
- The cuts can fill the whole shape or just a band of a given width - for example only the bent corner of a box.
- The cuts are made before the outline, so the part does not drop out of the sheet during the job.
Generators
Ready designs from a few numbers
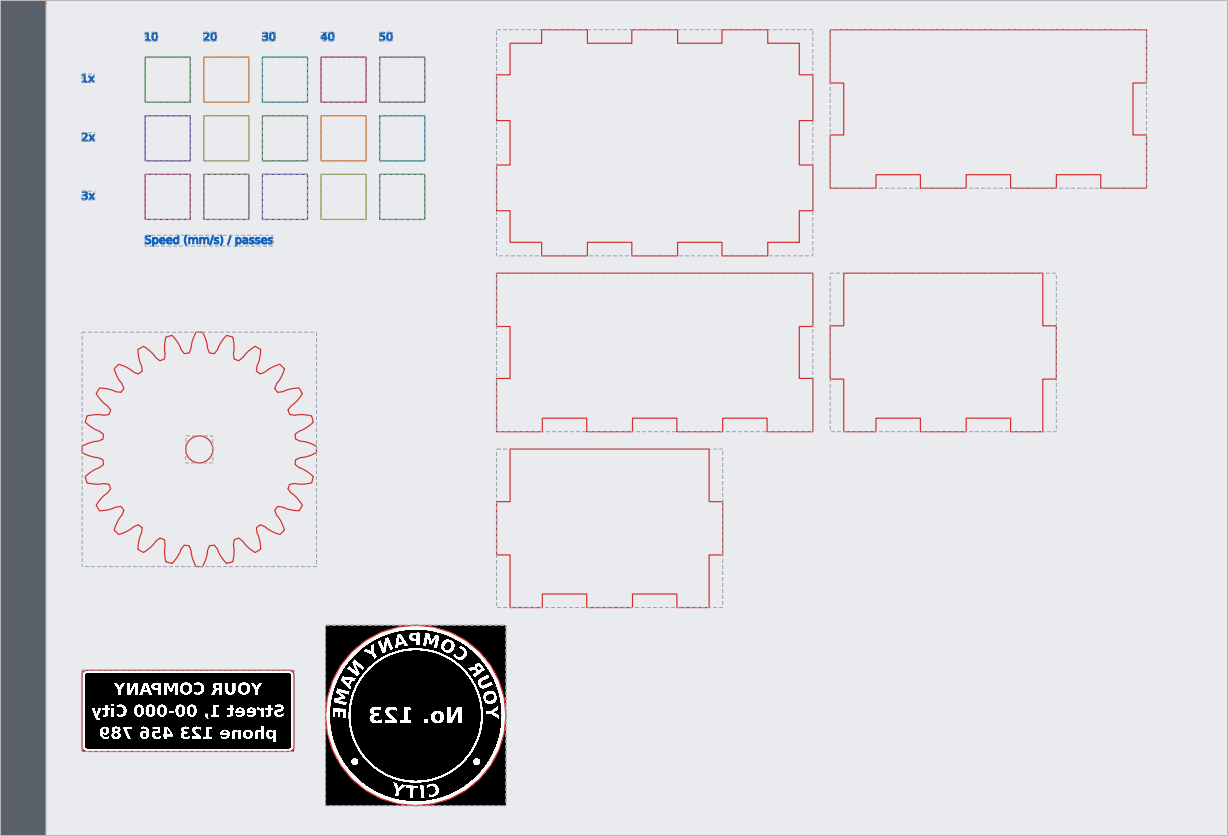
The Generators group on the toolbar makes a design from a few values. Each one has a preview, remembers the last numbers and puts the finished design on the bed at the head - one Undo takes it away.
- Material test - a grid of fields with different speed and power (or passes), with the values engraved. Cut it and pick the best field.
- Finger-joint box - bottom, walls and lid, with the kerf taken into account so the fingers fit tightly. The 3D tab shows the box assembled from the very parts that will be cut - turn it, pull it apart and slide the lid out. The parts lay themselves out on the bed, and what does not fit goes onto the next sheet (each sheet is its own group in the element list). As a beta: dividers inside, a sliding lid and a rounded box on a living hinge.
- Kerf test - a comb to measure the width of the cut and a plate with slots to find the fit.
- Gear, puzzle, ruler and QR code.
- Rectangular and round stamps - text (in an editor with bold and letter sizes), a logo and a frame in the usual sizes, text round a round stamp; inverted and mirrored for rubber.
- Test card - every operation on a piece of plywood, to check the laser.
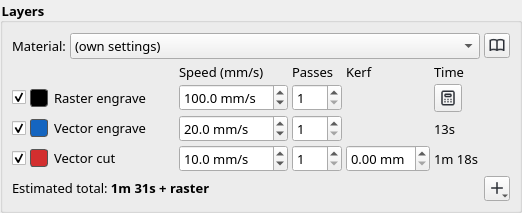
Layers and materials
Engrave, outline and cut in one job
- Each layer has its own speed, passes and power - just like in LightBurn.
- The colour of a shape tells what happens to it: red is cut, blue is engraved along its outline, black is raster engraved.
- The cut layer has a Kerf column: type the width of the cut (measure it with the Kerf test generator) and the parts come out exactly at their drawn size.
- Each layer shows its estimated time, with the time of the whole job at the bottom. Engrave / outline / cut only buttons let you do one, check it and only then cut.
- Pick a material from the list and all layers get its settings.
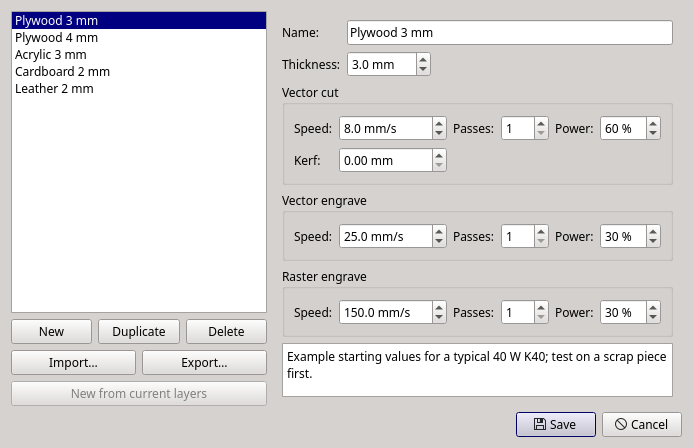
Material library
Set it once, then just pick it
Plywood 3 mm, plywood 4 mm, acrylic, cardboard, leather - example starting values for a typical 40 W K40 are there from the start.
- For each material: its thickness and the speed, passes and power for cutting, outline engraving and raster engraving, plus the kerf and extra layers.
- New from current layers - found the right settings on a scrap piece? Save them as a material with one click.
- Import and export the library - share your settings with someone who has the same laser.
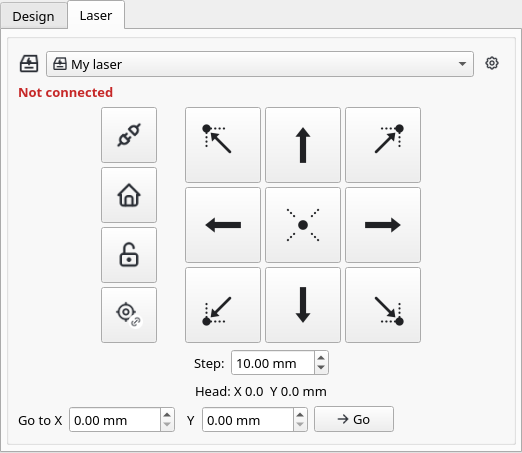
Laser control
The head exactly where you want it
- Laser profiles - the list at the top chooses the machine, and with it the board, bed, power and the programs before and after a job. A laptop moved between two lasers does not lose its settings.
- Homing, unlocking the rail and arrows with a chosen step - also from the keyboard. Right-click on an empty bed: Move the head here.
- The corner buttons use the head to show where the cut will land before you switch the laser on.
- Go to X / Y - the head drives to the position you type.
- The design stays where it lies on the bed (as in LightBurn) or follows the head (as in K40 Whisperer).
- Before the start: a boundary trace and a simulation with the time of the whole job.
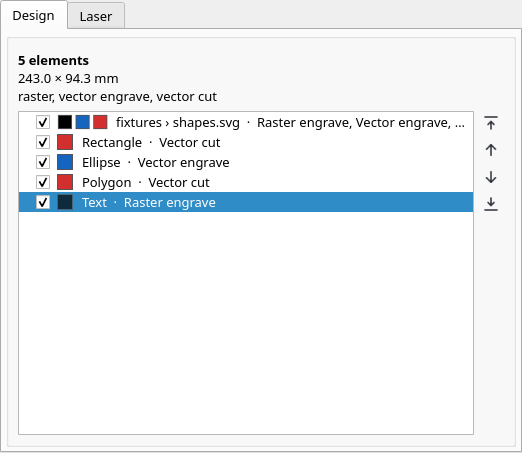
One project file
Prepare at home, cut in the workshop
The element list on the Design tab is also the order the laser works in: in each layer the element at the top of the list goes first. Move it with the arrows beside the list or with PgUp / PgDown.
The whole project - the layout on the bed, the layers, the drawn shapes and copies of the opened files - is saved in one .kerfly file. Take it to the computer at the laser and nothing gets lost on the way.
Kerfly also reads and writes the same settings file as K40 Whisperer, so your laser settings stay in place when you switch.
Screenshots
See what it looks like
Click a screenshot to enlarge it.
Getting started
Download, install, cut
Every release has ready-made packages: an installer for Windows 10 / 11, an AppImage for Linux and disk images for macOS. No Python to install.
Windows 10 / 11 - installer
Download Kerfly-…-windows-setup.exe from the releases page and go through the steps. The first time, tick "Install the USB driver for the K40 laser" (with the laser plugged in and switched on) - skip it if K40 Whisperer has already worked on this computer.
The installer is not signed, so Windows may warn you about it ("Windows protected your PC"): choose More info → Run anyway.
Linux - AppImage
One file, nothing to install. Download Kerfly-…-x86_64.AppImage from the releases page and run it:
chmod +x Kerfly-*-x86_64.AppImage
./Kerfly-*-x86_64.AppImage
In Kerfly, choose Settings → Add Kerfly to the applications menu… once - the program appears in the menu and .kerfly projects open with a double click.
Access to the laser's USB port is given once per computer: in Kerfly choose Laser → Allow USB access for the laser…, type your password, then unplug and replug the laser's cable. Kerfly offers this by itself when it cannot connect. It can also be done by hand, with three commands from the installation guide.
macOS 11 or newer - preview
Download Kerfly-…-macos-arm64.dmg (Mac with an Apple processor) or Kerfly-…-macos-x86_64.dmg (Intel), open it and drag Kerfly into Applications. No USB driver is needed.
Kerfly is not signed by Apple, so the first time open System Settings → Privacy & Security and choose Open Anyway. The macOS version has not been tested with a laser yet - feedback is welcome.
Connect the laser and cut
In the settings, choose the controller board and the bed size, connect the laser with a USB cable and click the plug button. Lay out your design, trace the outline, start.
Every step in detail: the installation guide and the user guide. Before the first job, check the installation with the self-test (--self-test) - it tells you whether the libraries and the driver are there and whether the program can see the laser, without moving it. Running from source, tests and translations are described in DEVELOPMENT.md.
Project status
A stable version, ready for everyday work
Kerfly 1.0 (6 November 2026) was the first stable release, and the following days brought, among other things, generators and macOS packages (1.1), kerf compensation and round stamps (1.2), copy and paste (1.4), programs before and after a job (1.5), laser profiles and a dark theme (1.6), single-line fonts, new patterns and picture tracing (1.7), and a 3D preview of boxes and groups within groups (1.8). Features marked as beta have not been tested on a laser yet, and the macOS version has not been tested with one.
Before version 1.0 the program went through two tests on a real laser with Windows 10. The first time (M3 board) the cuts kept their dimensions and the arrows, pause and stop worked; the problems found were fixed in version 0.15. The second test, already with the installer, showed that the installed program could not connect to the laser - since version 0.19 Kerfly looks for the USB library itself. Before every release Kerfly goes through tests of a whole working session in the real window: every tool, field and menu command is clicked as a user would. Still, always keep your hand near the laser's switch while it works.
Kerfly 2.0 is in testing (release candidate RC1, for now an AppImage for Linux or running from source): support for lasers with a GRBL controller, including popular diode lasers - saving G-code or driving the laser straight from Kerfly - plus tight nesting of parts on the sheet, joining loose lines into one path, a material library for each laser and a new look. For everyday work with a K40, version 1.8 is recommended. See the roadmap and the changelog.
Something not working? In Kerfly, choose Help → Report a problem - the program saves a diagnostic report and opens the issue form with the version, system and board filled in.
Got a K40? Try Kerfly
Download it, plug in the laser, lay out your design, trace the outline and start. Every report from real hardware helps - issues are welcome in English or Polish.
Screenshots: Cyryl Sochacki, from the Kerfly repository and from the program, version 1.8 (GPL 3). Kerfly grew out of K40 Whisperer by Scorch.Other projects
Vintyl
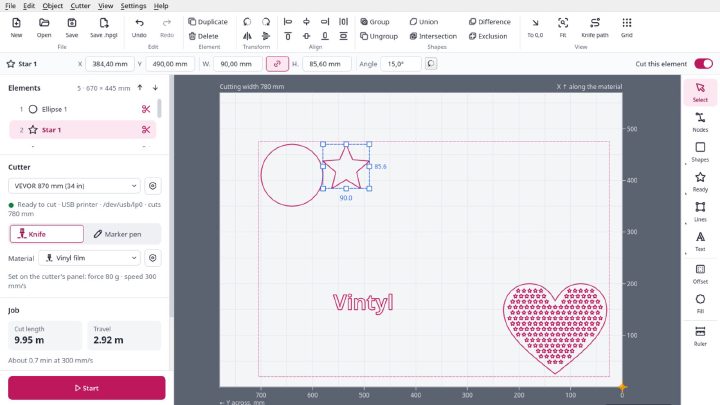
Free software for vinyl cutters on Linux: drawing, SVG and DXF files, laying out on the sheet and cutting straight from the window on VEVOR, Seiki and similar cutters. Knife compensation, materials, pen mode, designs in several colours. AppImage, GPL 3.
Millwise
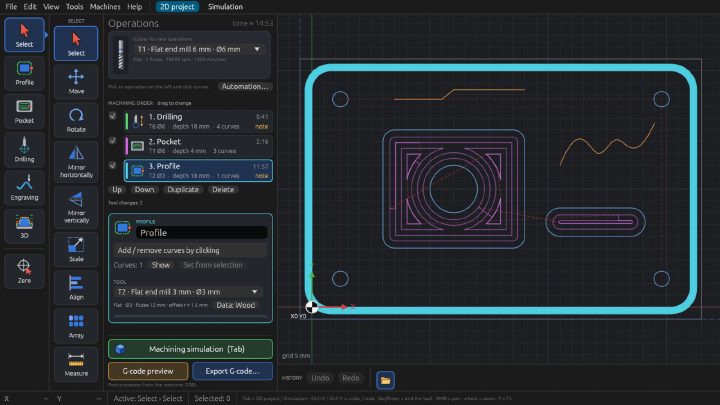
Free CAM software for 3-axis CNC mills: toolpaths and G-code for GRBL, FluidNC and LinuxCNC from DXF drawings and STL models. 2D and 3D machining, relief from a photo, simulation on the graphics card, a tool library. For Linux, an early test version.
Pakieciarka
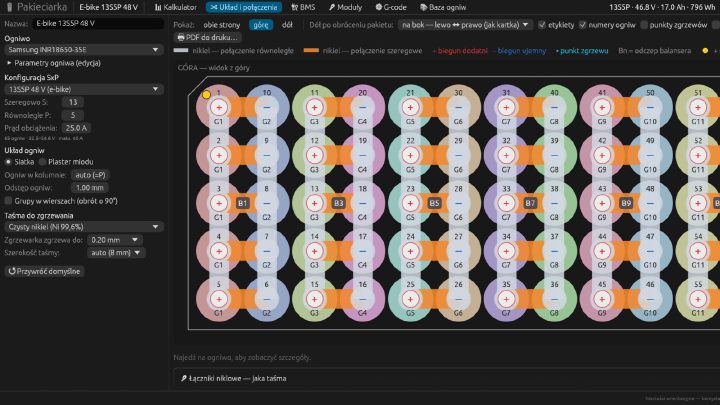
A configurator for battery packs built from 18650 and 21700 cells: a calculator, connection drawings, nickel strip and BMS selection, a heat map, a 1:1 PDF template and G-code for a CNC spot welder. Linux, macOS and the browser. Interface in Polish.